How to Update Plugins on a WordPress IDX Website
To update plugins on a WordPress IDX website, you should navigate to your dashboard, select the plugins that have new versions available, and apply a bulk update. But first you should read about the updates and backup your site.
Updating plugins is a common web maintenance practice for a WordPress IDX website. Downloading the latest plugin versions can keep your site operating smoothly and help keep it secure. But it can also cause issues if an update conflicts with another plugin you are running. So it’s important to be diligent, learn what the updates do, and maintain regular site backups.
How to Update Plugins on a WordPress IDX Website
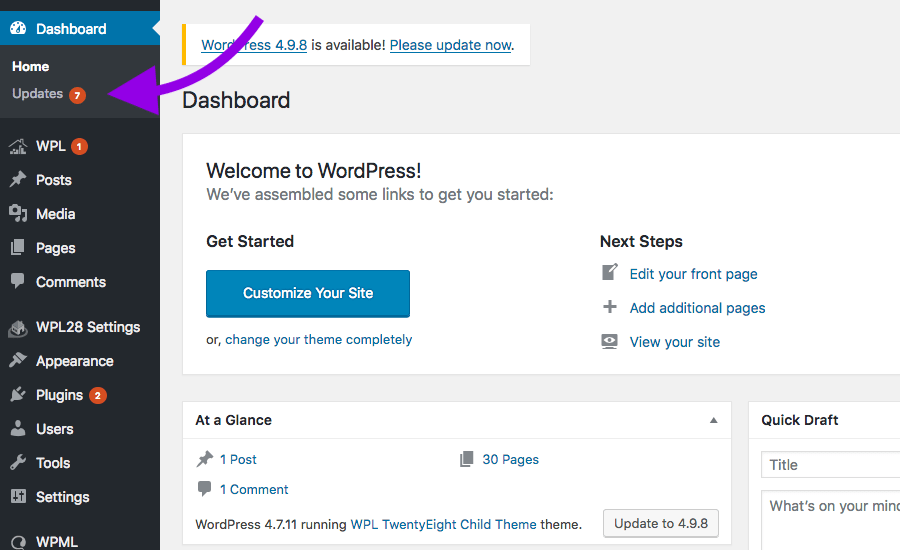
- Navigate to Dashboard > Updates
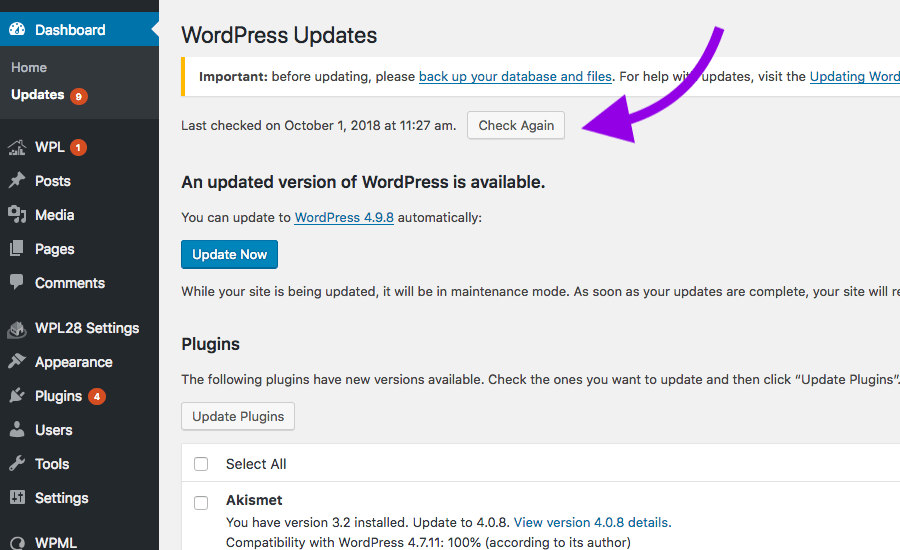
- Select Check Again
- Read View version details
- Backup site
- Select plugins with updates available
- Apply bulk update
LUKE’S TIP:
 Navigate to Dashboard > Updates
Log into your WordPress account, and navigate to the updates panel. WordPress automatically checks for updates, so you may have some already available.
 Select Check Again
If you have not updated your plugins in a while, it may be good to click Check Again. This will manually check for updates to make sure you have the newest versions in your queue.
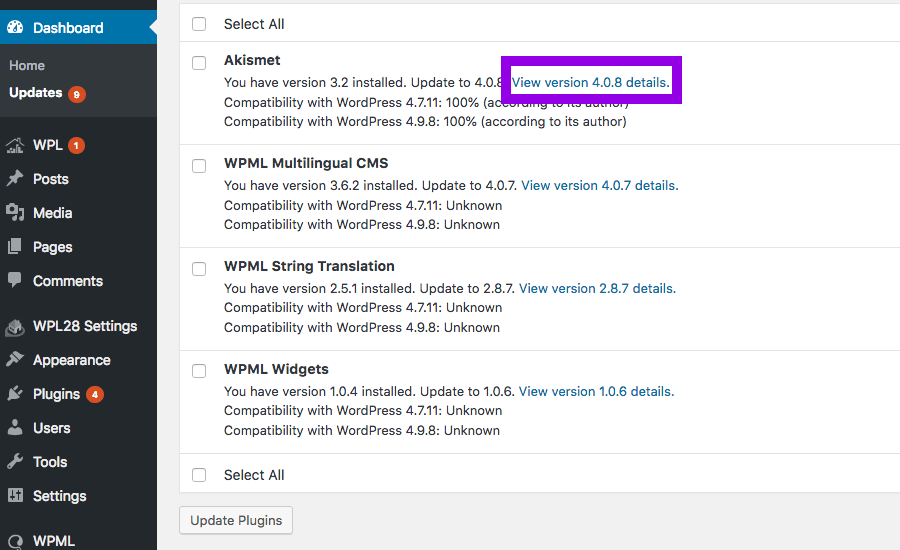
 Read View version details
Click View version details to find developer notes about the updates. This will help you understand the changes the new plugin will make and help you avoid conflicts with other plugins.
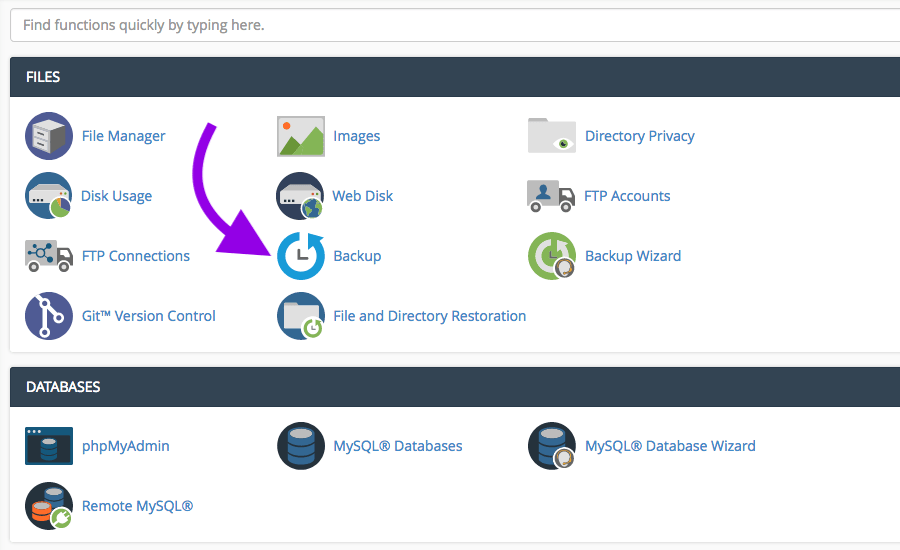
 Backup site
It’s good practice to backup your site before making any changes. You can do this by logging into cPanel and navigating to Files > Backup. For more, see our blog How to Backup Your WordPress IDX Website.
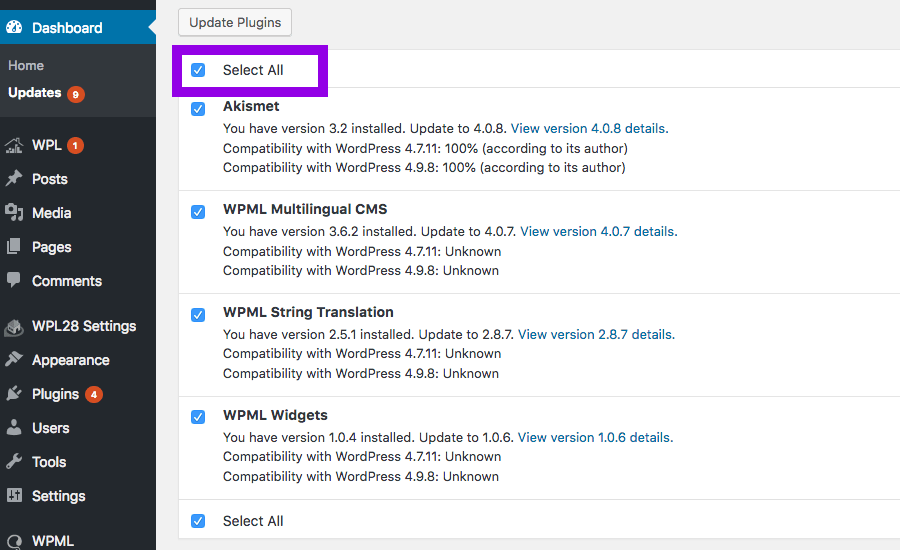
 Select plugins with updates available
When you are ready to run the updates, select the plugins on your update page.
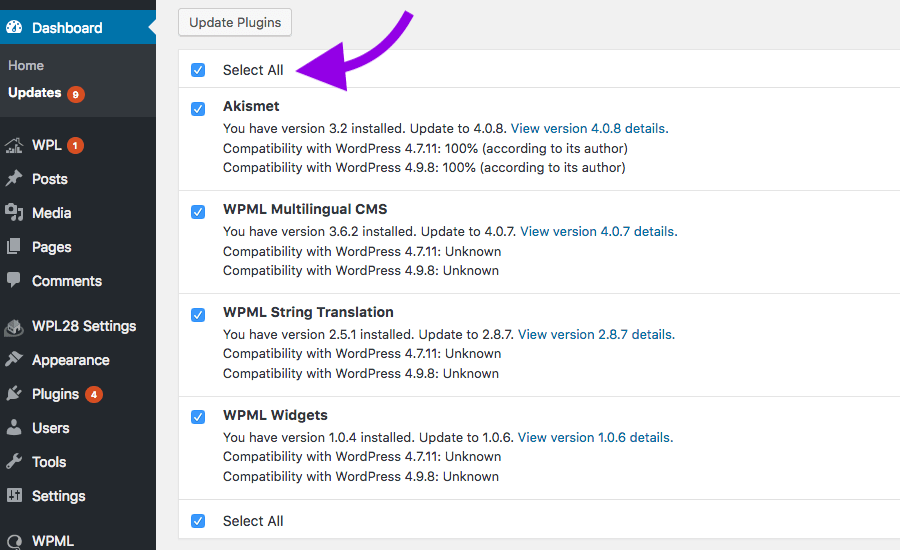
 Apply bulk update
Then click Update Plugins and the update will run.
 If the update causes a bug on your site, you can undo the updates by restoring the backup or deactivating and installing the rollback version.
For more tips and tricks for you WordPress IDX website, check out 13 Steps to Build An IDX Real Estate Website With WordPress and How Can I Switch My WordPress Real Estate Website From IDX to RETS?
Sorry, the comment form is closed at this time.