How to Install a Plugin on a WordPress IDX Site
Once you have your WordPress IDX site set up, you will probably want to install some plugins. Plugins allow you to integrate your site with third party software. This software can add to the functionality of your site, help you understand your business better, and automate certain tasks.
In this guide, we will go step by step to help you install a plugin on a WordPress IDX site.
There are three ways to install a plugin on WordPress:
- Search and Install
- File Upload
- cPanel
In most cases, you will probably end up using the file upload method, but we will cover all three methods in this blog post.
How to Search For and Install a Plugin on a WordPress IDX Site
This method can help you quickly find and install free plugins from the WordPress directory. Unfortunately, this method will not work for any paid or proprietary plugins because WordPress does not list them in their directory.
Step 1
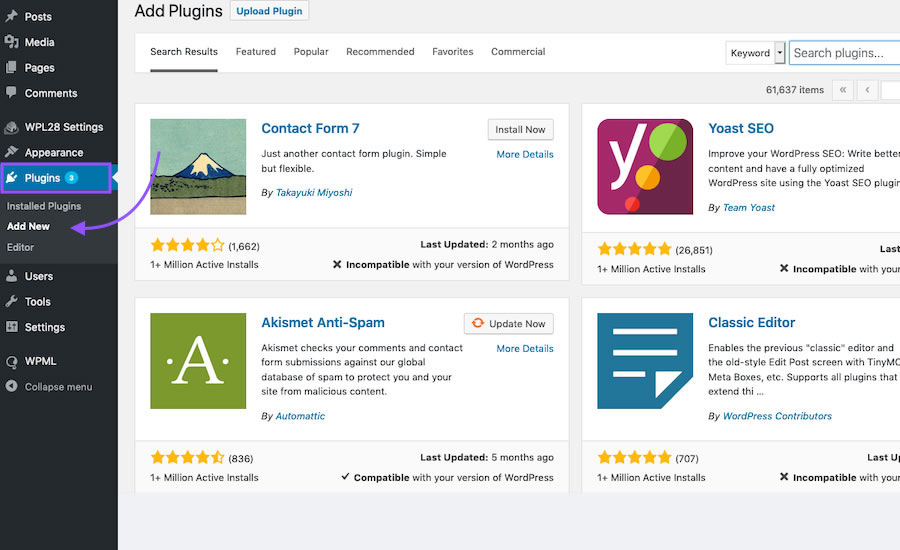
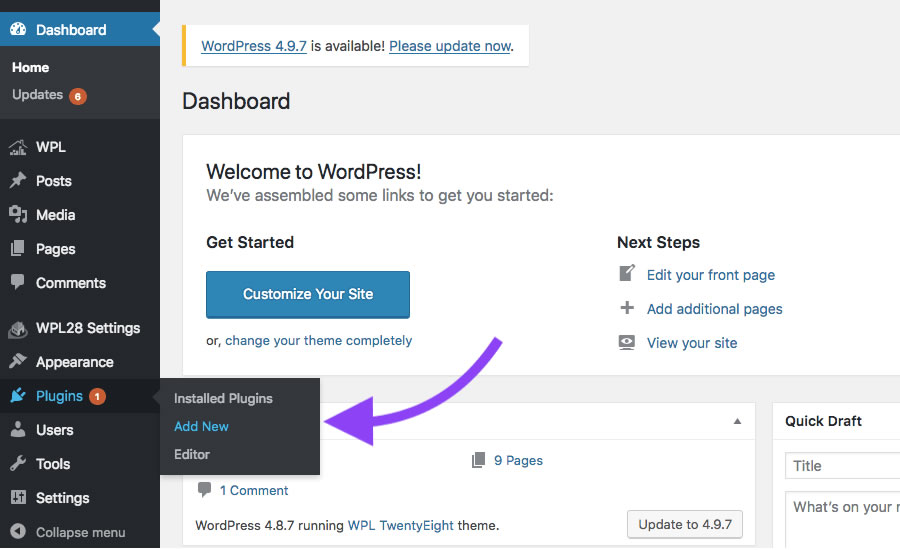
Navigate to Plugins > Add New
From your WordPress dashboard, hover over Plugins, then select “add new”.
This will bring up a list of featured plugins that you can install with a single click.
Step 2
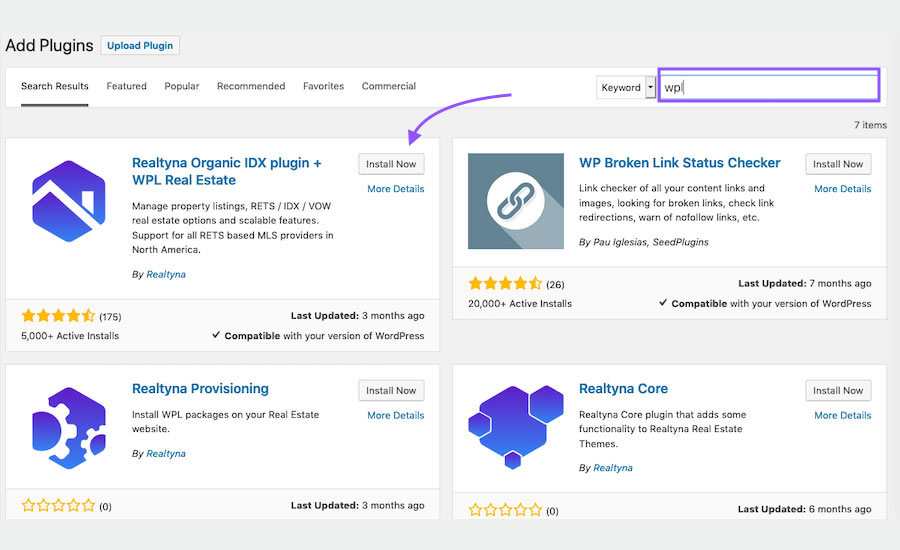
Search and Install
From this panel you can also search all free plugins listed by WordPress. Type your desired plugin in the search bar. Then click Install Now.
Step 3
Activate
Once installed, an activate button will appear in the same window. Click it to go live with your plugin.
You have successfully searched for and installed a free WordPress plugin. Some plugins will require configuration, which can be made in that plugin’s settings.
How to Upload a Plugin File on a WordPress IDX Site
Paid plugins are not listed in the WordPress directory. Instead, they are often provided to you in a zip file once you complete your purchase. To add these plugins to your WordPress IDX site, you will need to upload them from the WordPress admin panel.
Step 1
Navigate to Plugins > Add New
The first step mirrors the search and install method. From your dashboard, hover over Plugins and select “Add New”.
Step 2
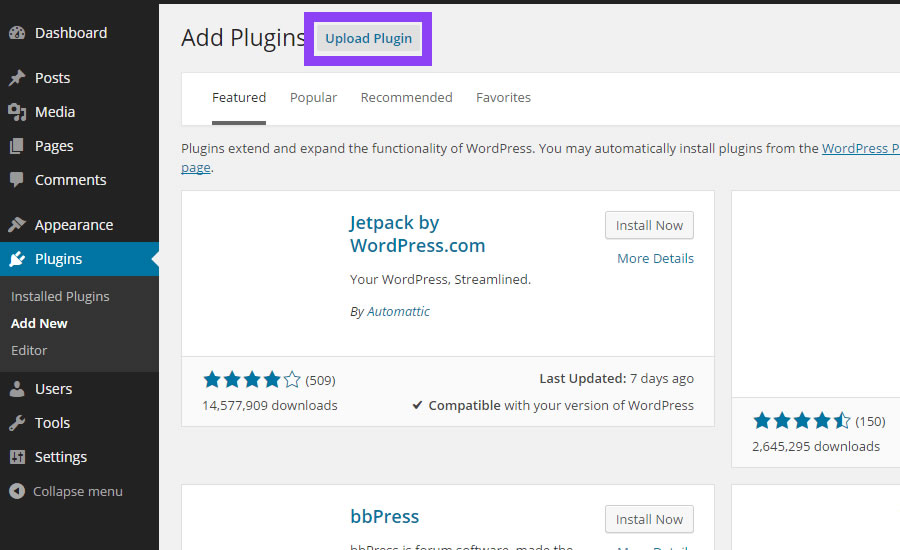
Select Upload Plugin
In the upper left hand corner you will see a button to upload a plugin. Click this. WordPress will open a new dialogue.
Step 3
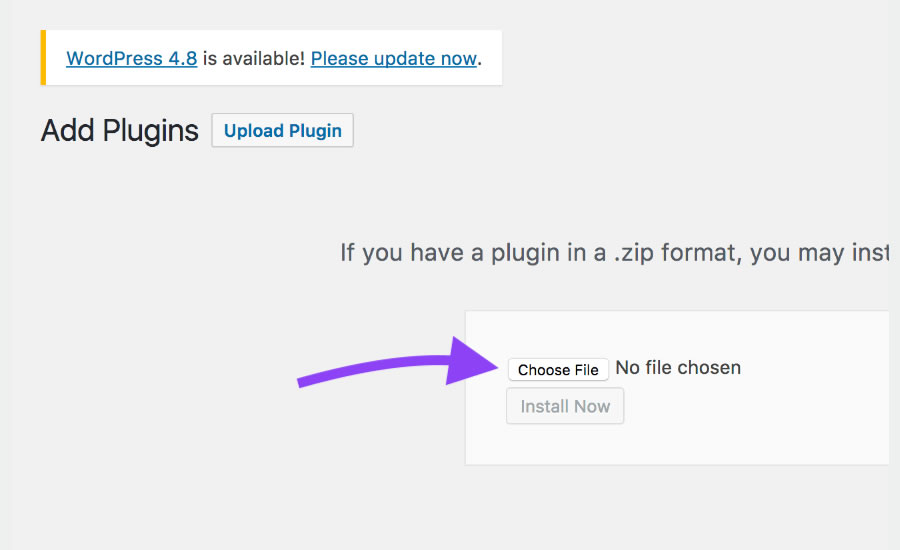
Browse and Install
From the upload panel select browse. Then, search your directories for the plugin zip file provided to you at purchase.
Step 4
Activate
Once the install is complete, select the Activate Plugin button to begin using your plugin.
You have successfully installed a plugin by uploading it through the admin panel.
How to Add a Plugin Via cPanel on a WordPress IDX Site
There is one final method to install a WordPress plugin. Here you will upload your plugin manually via cPanel. This method is the least user friendly, so it is likely the least popular.
Still, it could be helpful in some limited situations.
Step 1
Unzip Your Plugin File
Unlike an upload through the admin panel, a cPanel upload requires your plugin file to be unzipped. Unzip the folder to a directory that is easy to find.
Step 2
Access your cPanel file manager
Log into your hosting control panel (usually cPanel) and navigate to file manager.

Step 3
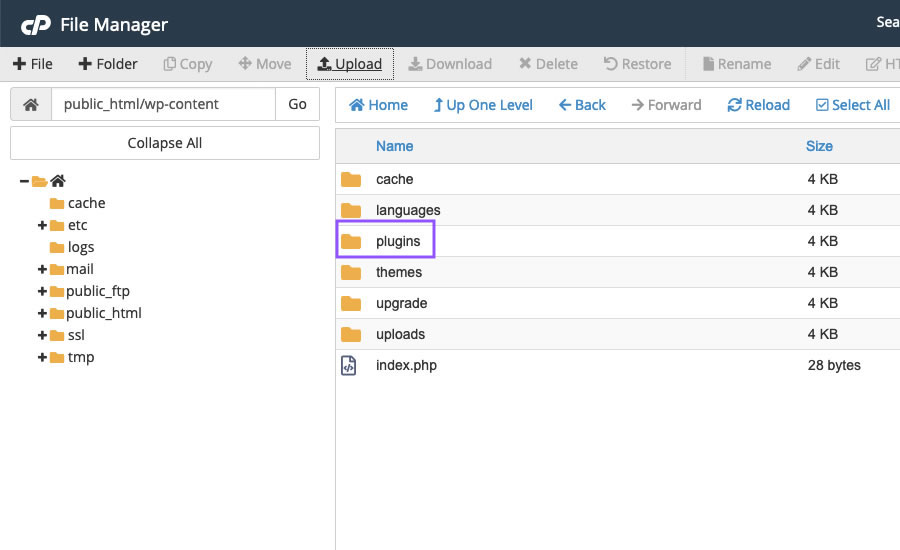
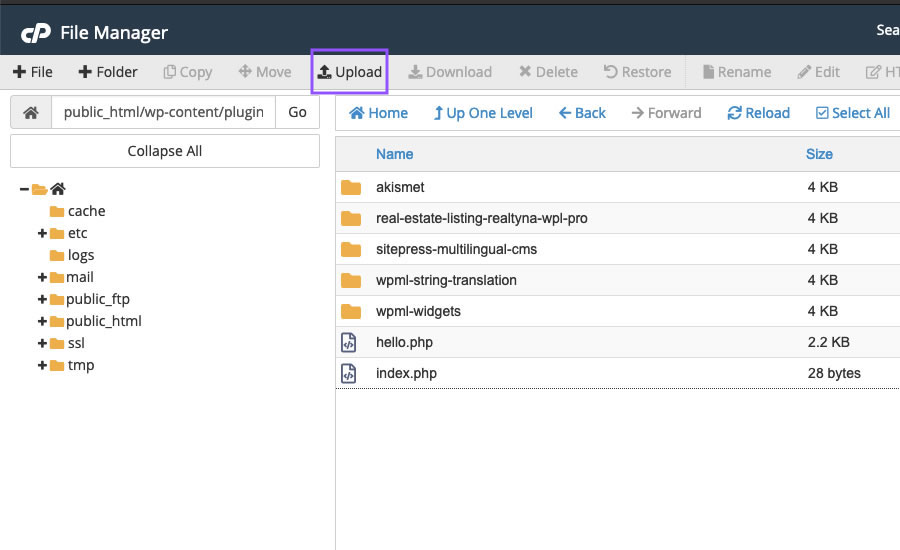
Navigate to the plugins directory
Click through public html > wp-content > plugins. Here you will find all plugins already installed on your WordPress site.
Step 4
Upload plugin
Select the upload icon and browse for your plugin folder
Step 5
Activate
Once uploaded you should see your plugin installed in your WordPress dashboard. You will need to activate it like in the other methods.
Now you know how to install a plugin on a WordPress IDX site. Questions or feedback? Leave them in the comments. If you liked this article and want more WordPress IDX tips, see How to Create a Custom 404 for Your WordPress IDX Real Estate Website.
*Please note: Not all plugins are 100% compatible with other plugins, solutions or Realtyna products. Please confirm or test compatibility with your solutions before implementing. While we are happy to help you find a compatible solution, we do not endorse any 3rd party products. Suggestions are only made for reference or guide.
Sorry, the comment form is closed at this time.