How to Build a Real Estate IDX Website with Webflow
Webflow has become a household name in the world of CMSs and builders in the last few years. The rise in popularity comes mostly from the conveneince in design on th front side. The flexibility provided by this web builder let it become very popular, especially in the real estate market.
In this guide, my aim is to walk you through a simple setup of an IDX website with weblfow and Realtyna’s Orgnaic MLS widgets.
We have also done a review of some of the best web builders for the real estate industry, you can check it out here:
7 Best Real Estate Website Builders Compared (2023)
Let’s setup a Webflow website with IDX features.
Step 1: Sign Up and Log in to Webflow
Go to the Webflow website and sign up for an account. Once registered, log in to your account.
Step 2: Create a new project and Setup Your Site
Here is how you can get started with a Webflow website:
- After logging in, click on “Create New” and select “Site” from the options provided.
- Choose a template to start with (optional) or select a blank project.
- Spend some time getting familiar with the Webflow Editor interface, which includes the canvas area where you build your site, the top toolbar with various options, and the sidebar containing elements, styles, and settings.
- Start designing your website by dragging and dropping elements from the sidebar onto the canvas.
- Customize the elements’ styles, such as fonts, colors, sizes, and spacing, using the right sidebar options.
- Create new pages by clicking the “Pages” tab on the left sidebar and selecting “Create New Page.”
For a full guide on how to configure and customize your Webflow site, check out the following guide:
Webflow tutorial: the absolute beginner’s guide
Step 3: Sign Up for MLS Router™ API
Realtyna offers organic MLS integration through its powerful MLS Router™ API. It is the only solution on the market where you can benefit from all the SEO value of your MLS listings on the fly.
- Go to MLS Router API™ page.
- Sign up for the right package based on your needs.
- There is a free demo version for you to test the solution.
- Once you sign up, our MLS department will get in touch with you to initiate the MLS approval process.
- Once approved by the MLS, you can receive live, accurate data from your API key.
Please note that MLS listings are provided upon the approval of the your MLS. You must be an active memeber of the MLS. For more details, contact us via our live chat, phone numbers or request more information here:
Step 4: Add MLS Widgets to Your Site
To add Realtyna’s MLS/IDX widget to your Webflow site, follow these steps:
- Open your site in the editor mode and create a page where you need to display your MLS listings.

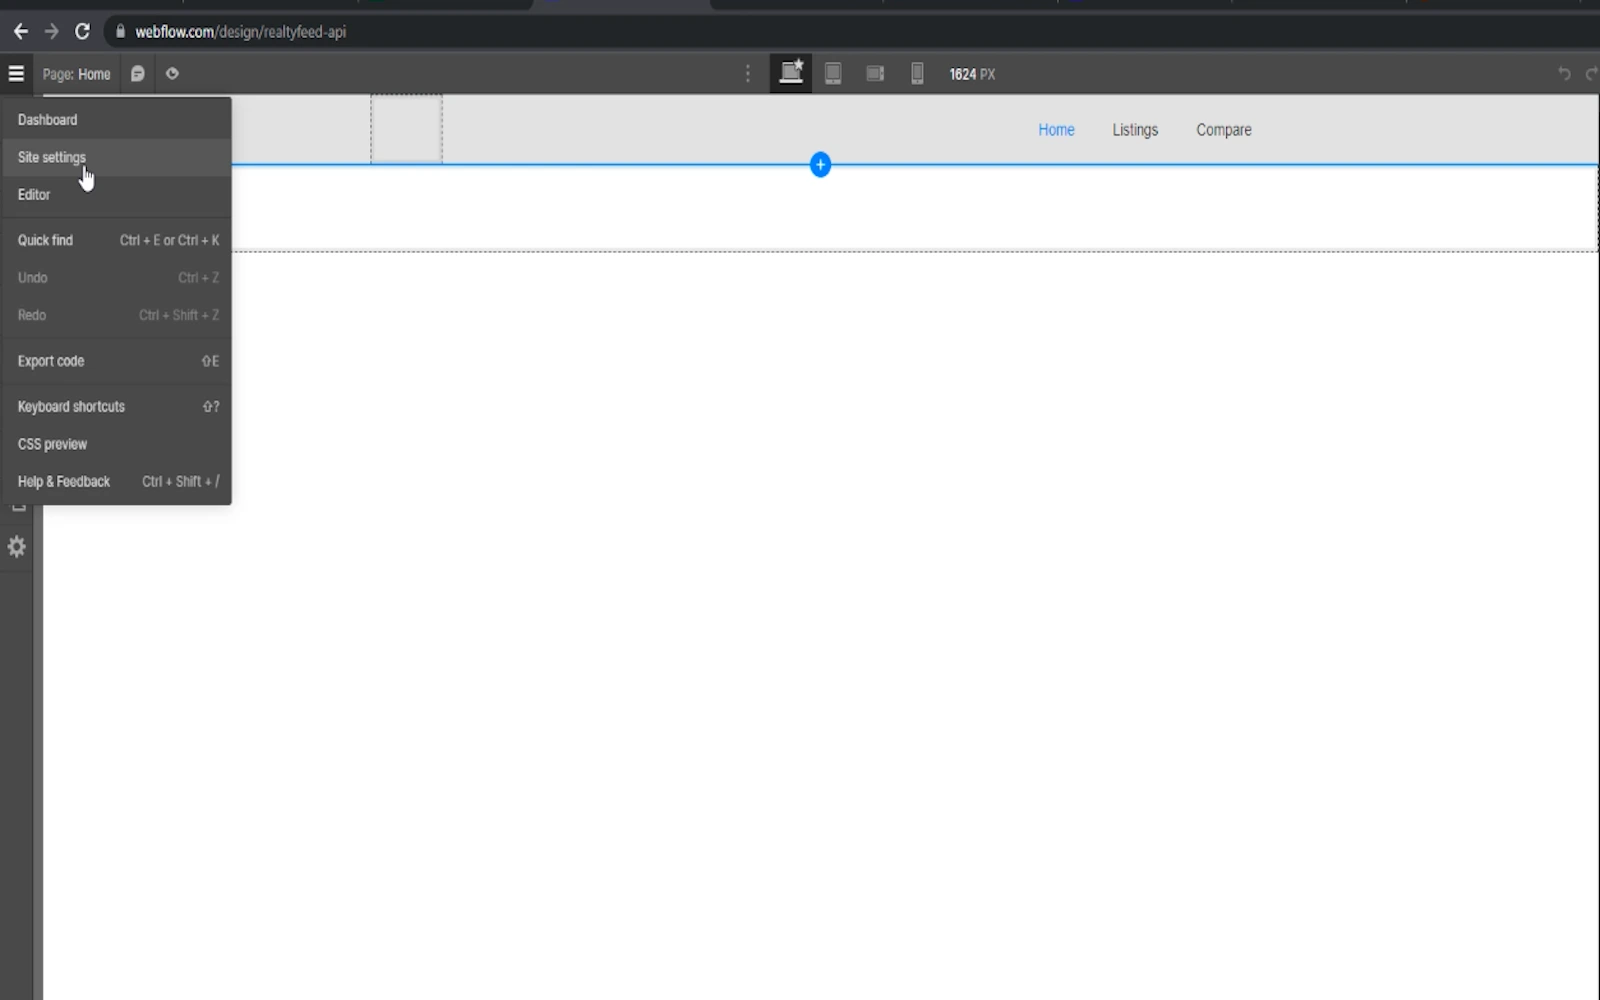
- Click on “Site Settings” from the Hamburger menu on the left.

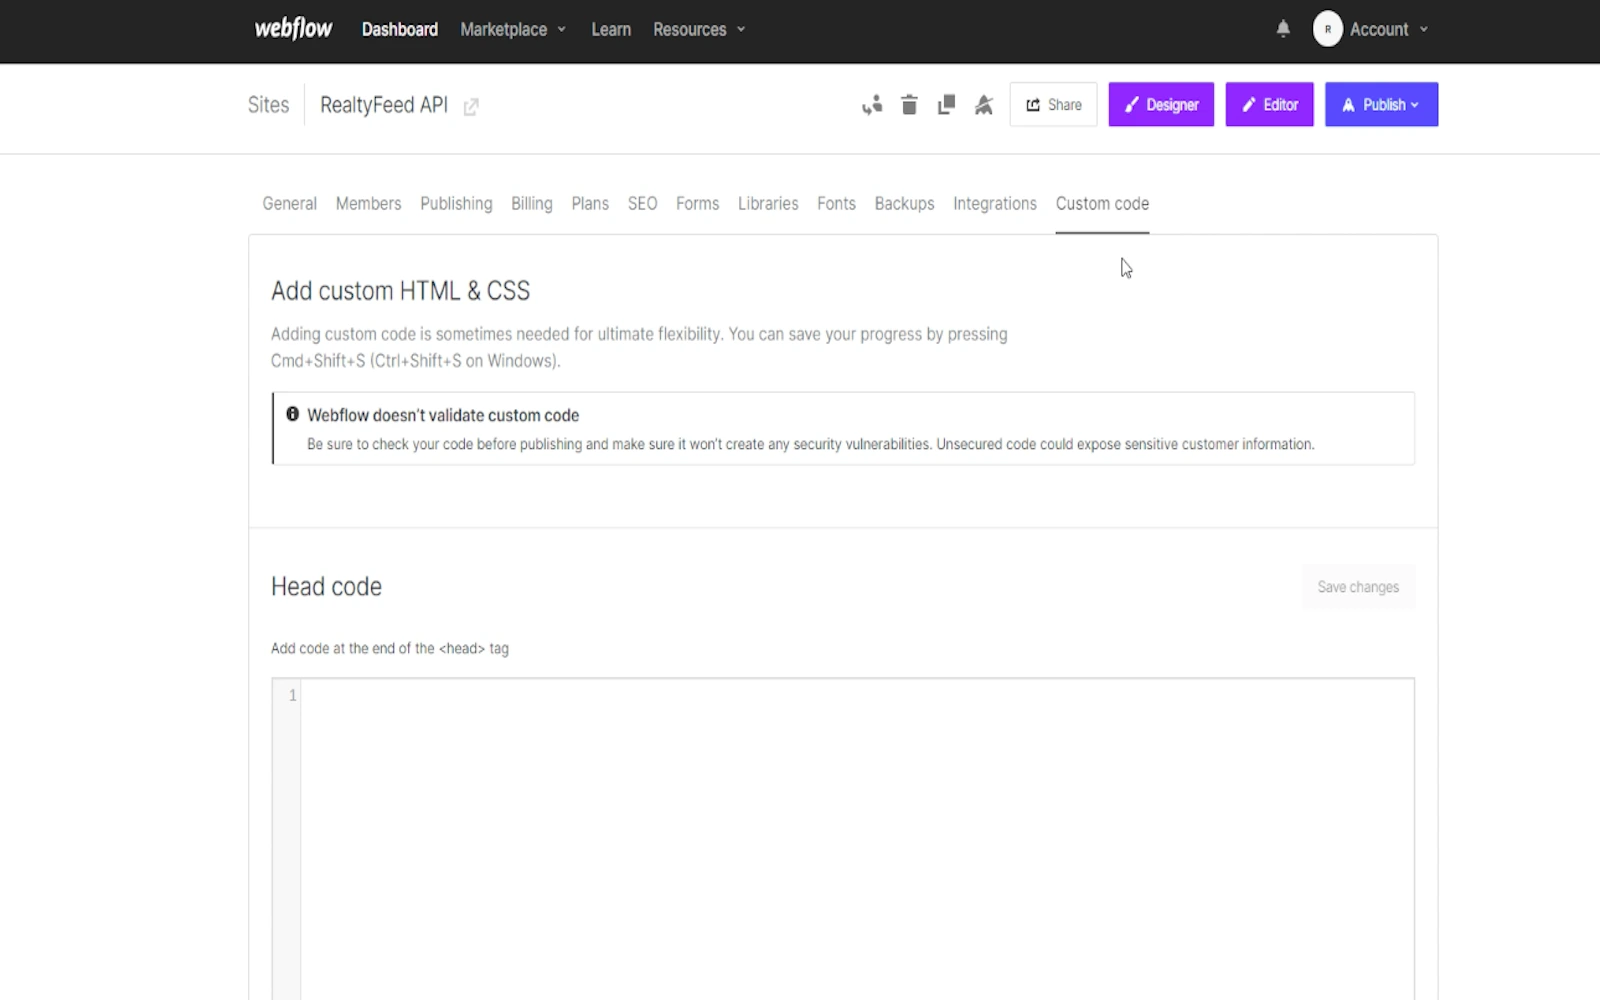
- Then, click on the “Custom Code” tab:

Please note that you need to upgrade to one of the paid packages to be able to access the custom code feature.
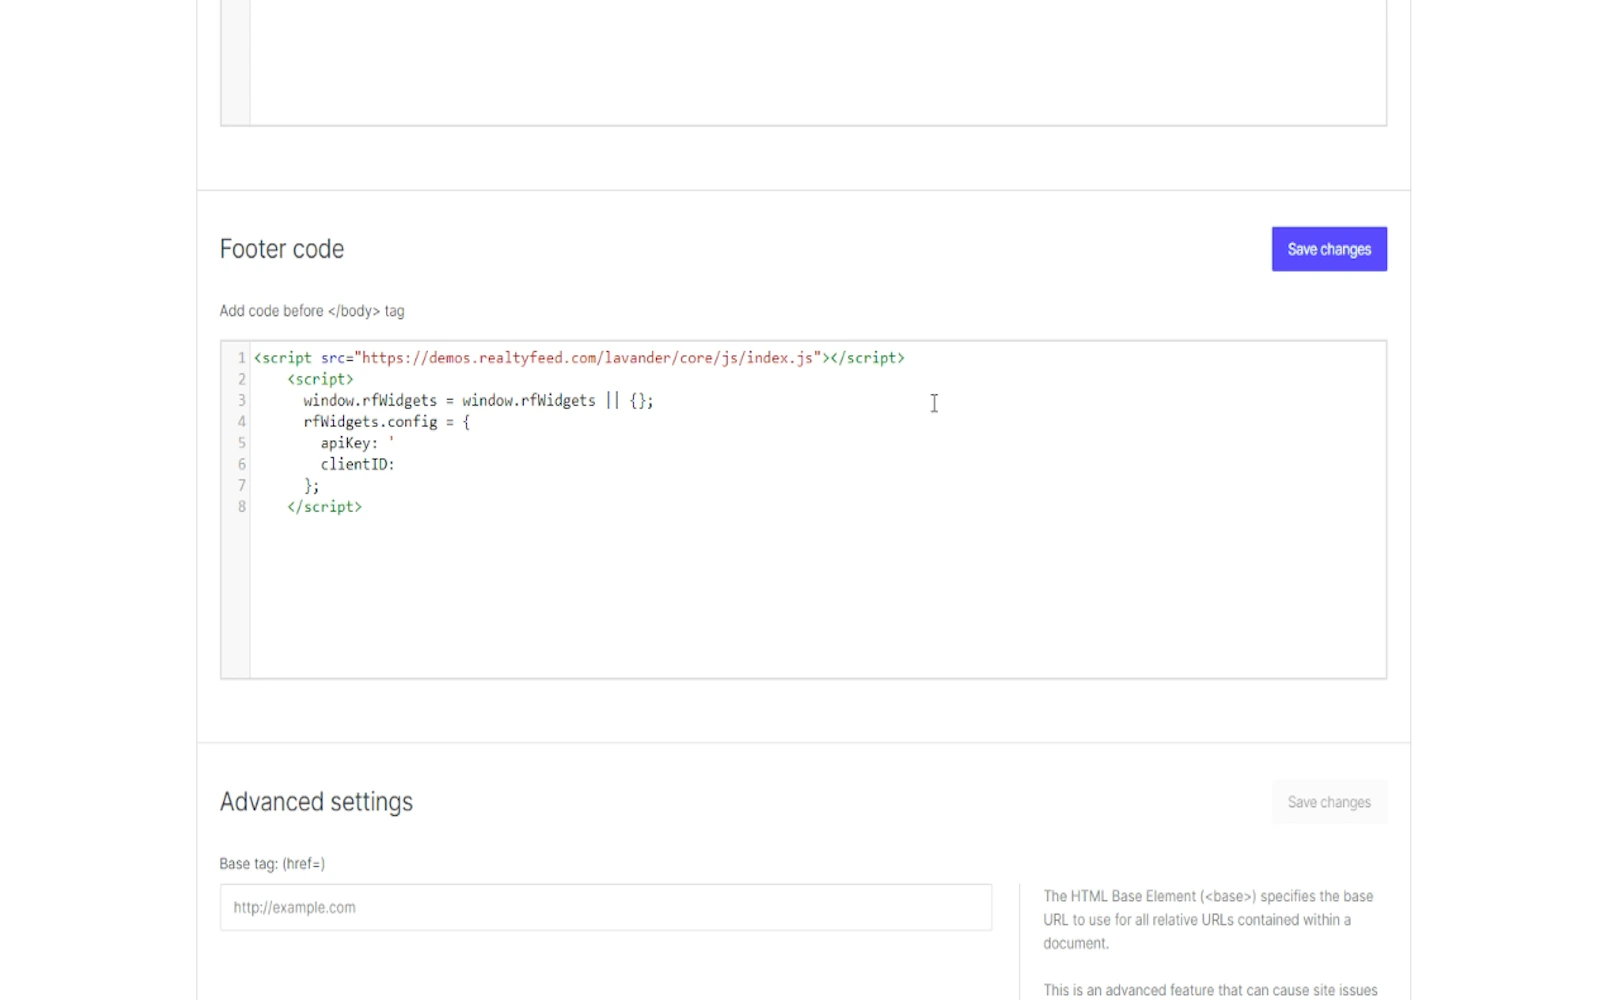
- Add your agent script provided to you by Realtyna (Read more in Step 3)

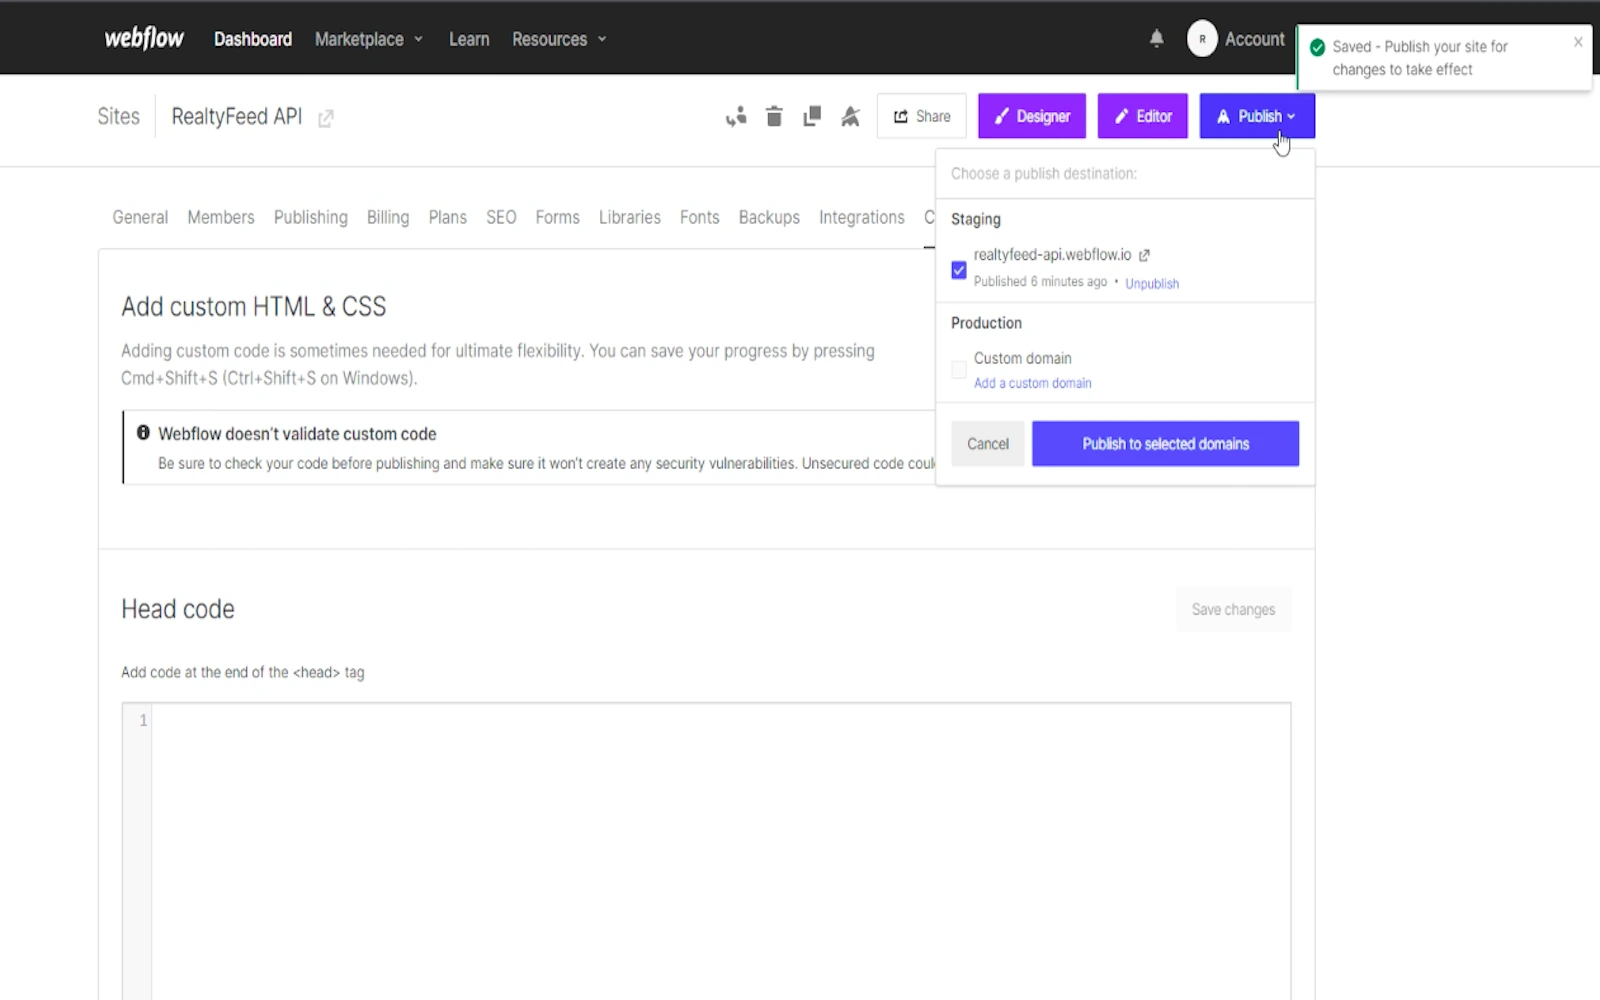
- Click “Save” and “Publish”.

Here is a demo site with Realtyna’s MLS/ IDX widget:
https://realtyfeed-api.webflow.io/
Step 5 Add Final Touches
Use Webflow’s preview feature to see how your site looks and behaves in different devices and screen sizes. Test your site’s functionality and responsiveness on various devices to ensure it works well for all users.
If you are satisfied with your website, click the “Publish” button in the top right corner.
Building a website on any platform is a creative process so make sure play around with the editor and features as much as you can until you get the best result.
What Is Next?
Realtyna’s MLS/IDX widgets are designed to help you bring organic MLS listings to your webite and CMS without any coding or extensive customization. These widgets provided support for almost every CMS or builder you know, including but not limited to:
- Wix
- Hubspot
- WordPress
- GoHighLevel
- Weebly
- SquareSpace
- Duda
- And more
Contact us today for a free demo tour, our solutions expert will be happy to help you with your questions.


Sorry, the comment form is closed at this time.