How to Create Custom Listing Urls for Your IDX WordPress Website
It is hard to understate the importance of SEO. A well-placed keyword can make the difference between ranking highly and falling behind competitors.
Most agents incorporate keywords in their domain name and page titles. But did you know you can bring them into your listing urls too? You can do it with Realtyna’s IDX software for WordPress, and in this blog we will show you how.
What Is Your Listing Url?
Your listing url is the public web address that links to one of your listings. With Realtyna, each of your listings has a unique page and a unique url. So if you host 5,000 listings on your site, you will have 5,000 pages on your site and 5,000 listing urls.
Why Should I Customize My Listing Urls?
All these listings present an SEO opportunity. Each of these pages can be indexed by search engines and help your rank. This is especially true if you customize your listing urls with important keywords.
How to Create Custom Listing Urls?
You will need Realtyna’s IDX software to create custom listing urls for your IDX WordPress website. These steps will show you how to navigate the software and produce the results you seek.
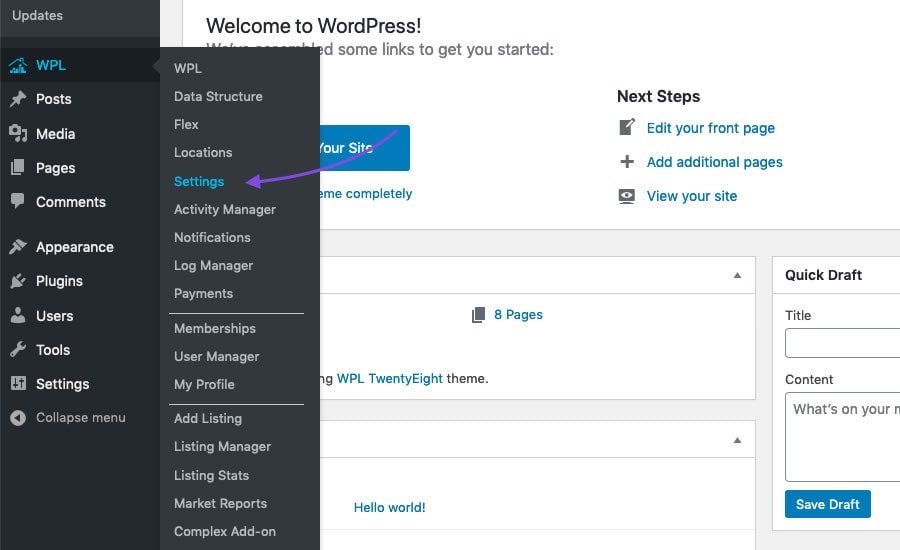
Step 1 – Navigate to WPL Settings
From your WordPress dashboard, select WPL > Settings
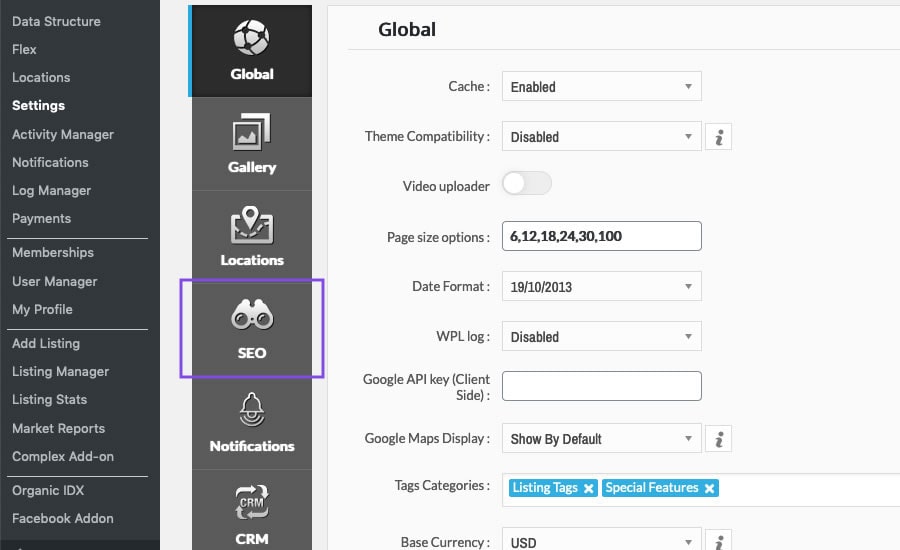
Step 2 – Select SEO
Select the SEO from the options panel
Step 3 – Arrange Link Pattern
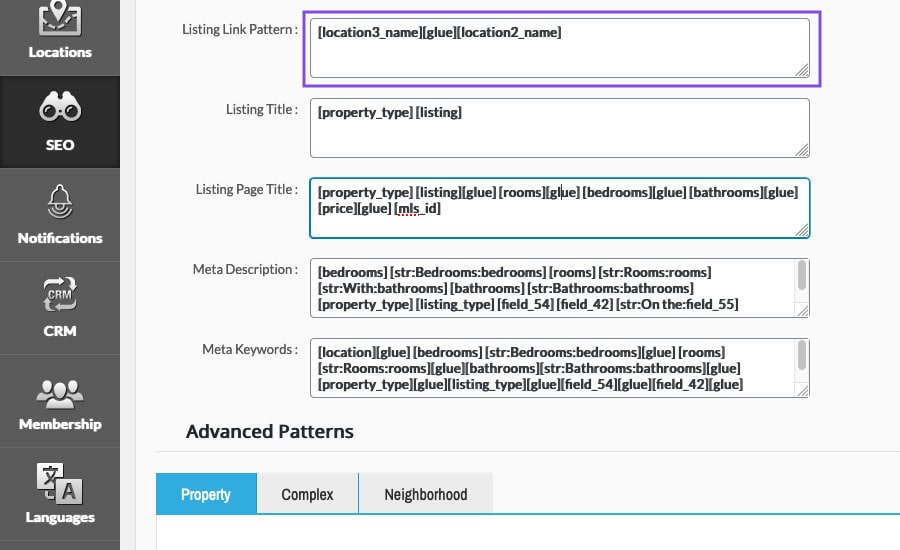
In the Listing Link Pattern window, you can adjust the default listing url. You can add/remove url placeholders and change their order. This bracketed text is dynamic and it will change based on information in the listing.
In this example, we’ve removed all placeholders except location3_name (county) and location2_name (state). This will construct our listing urls as follows:
www.samplerealestate.com/properties/8223-Alameda-California
The leading numbers are a unique property identifier. To learn each location name, you can select Location from the options panel.
Step 4 – Insert Static Keyword
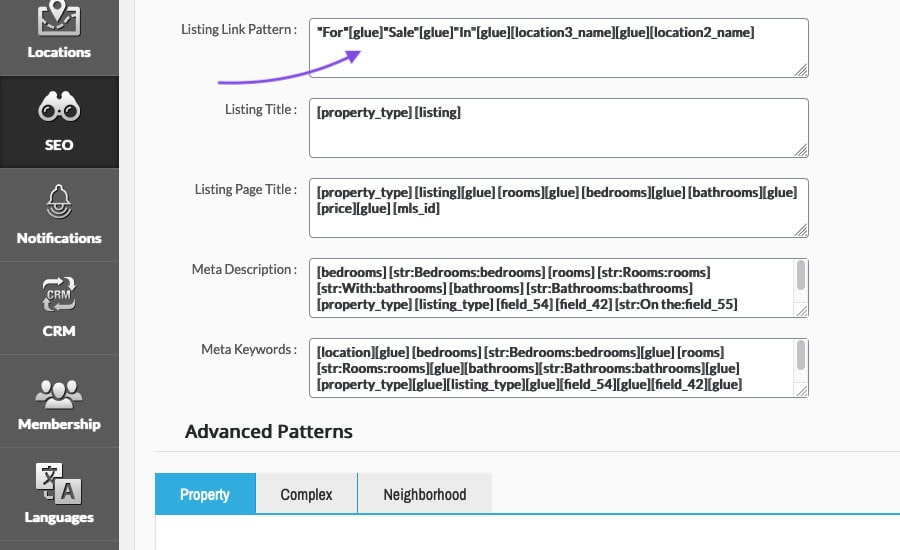
To insert static text, you must place your words in quotes. You also must use the joining operator, [glue], between each word. In this example, we’ve added the static keywords “for sale in” to our link pattern. These words will now appear in each of our listing urls as follows:
www.samplerealestate.com/properties/8223-For-Sale-In-Alameda-California
Step 5 – Clear Cache
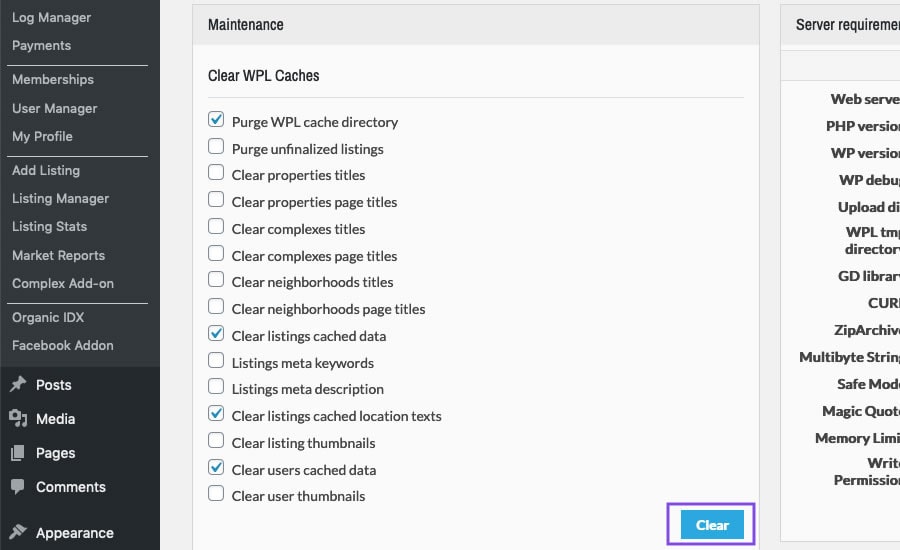
After each change to the listing link pattern, you must clear the cache.
That’s it. Your listing urls will automatically update to reflect the new pattern you’ve chosen. And with some clever keywords you will start seeing some new traffic to your site.
Now you know how to create custom urls for your IDX WordPress website. Is there something else you’d like to know how to do on your IDX site? Leave a suggestion for future blogs in the comments. Or for more tips, see our blog How to Create a Custom 404 for Your WordPress IDX Site.


Etienne
Posted at 03:34h, 16 MarchHi, if i want to remove the /properties/, how should i do ? I want my properties page to show all my link but i want each url to be like mywebsite/thelinkurl but without the /properties/ for the SEO. Thanks a lot…
Tait Militana
Posted at 04:59h, 16 MarchHi Etienne, that’s an interesting request. We’ve never had anyone ask to remove this before. You can certainly change “properties” to some other page name. For removing it, you can try WPL>Settings>SEO and change the main permalink from properties to home. But please do it in a test area first to make sure it works as you intend.