How to Build a Multilingual WordPress Real Estate Site With Realtyna IDX and WPML
In some communities, a multilingual real estate site is all but mandatory. In others, it may help you attract international investors. Whatever your scenario, a multilingual real estate site can help you expand your client base and close more sales.
In this tutorial, we’ll show you how to build a multilingual WordPress real estate site with Realtyna IDX and WPML.
STEP 1
Buy Domain and Hosting
Buy a domain name and hosting package that meet these minimum system requirements. Or choose a Realtyna hosting plan.
STEP 2
Install WordPress
Unzip the WordPress file, upload the files to your webserver, and then access your URL to run the WordPress installation script.
STEP 3
Choose a Realtyna IDX Package
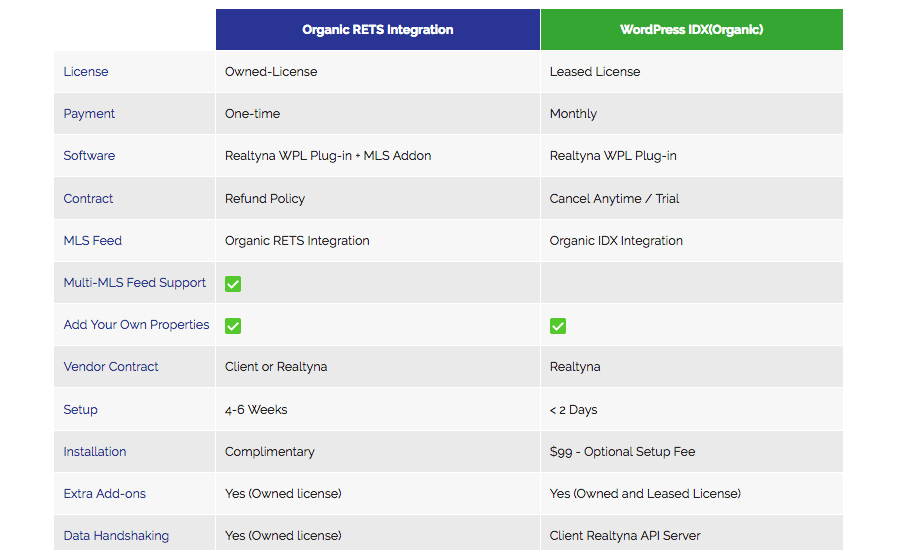
Choose your preferred IDX setup: Organic RETS Integration or Organic IDX.
 LUKE’S TIP:
STEP 4
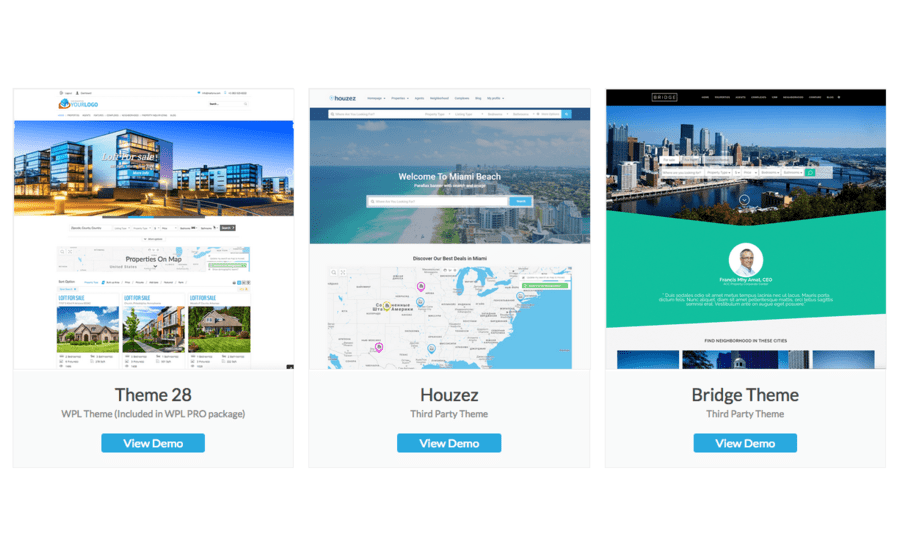
Choose a Theme
Pick a theme for your new site.
 STEP 5
Install Realtyna
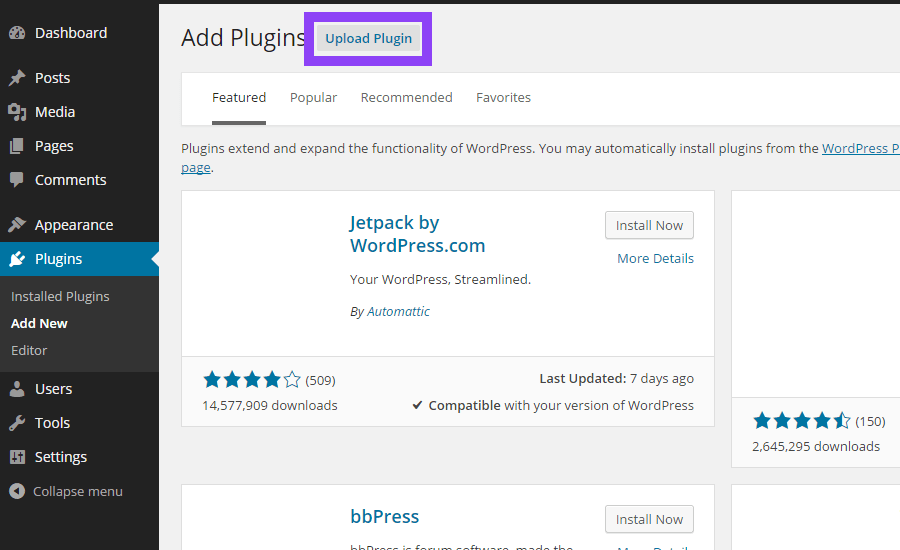
In your WordPress dashboard, navigate to Plugins, and then click Upload Plugin.
 STEP 6
Install Theme
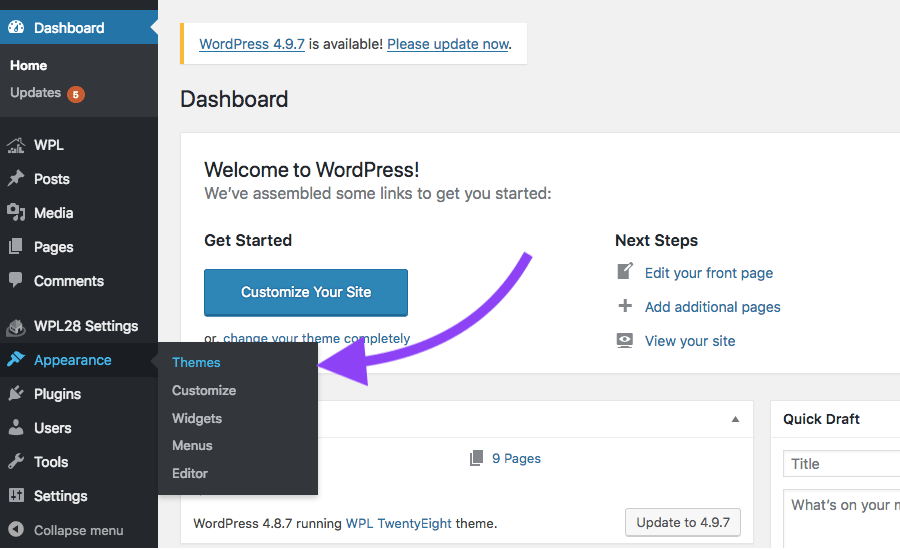
Navigate to Themes, and then click Add New.
 STEP 7
Download WPML
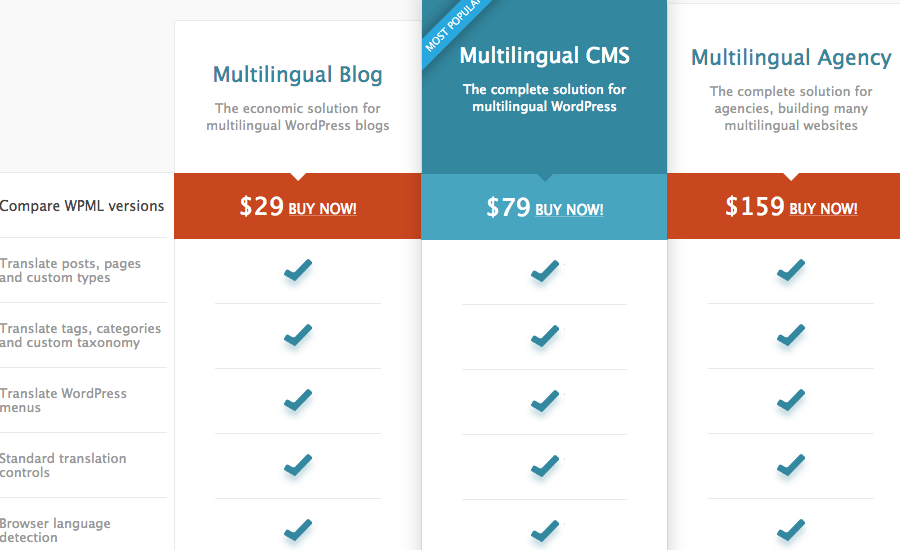
Choose your WPML package and download (we recommend multilingual CMS).
 STEP 8
Install WPML
Follow Step 5 to install WPML to your site.
STEP 9
Configure IDX Content
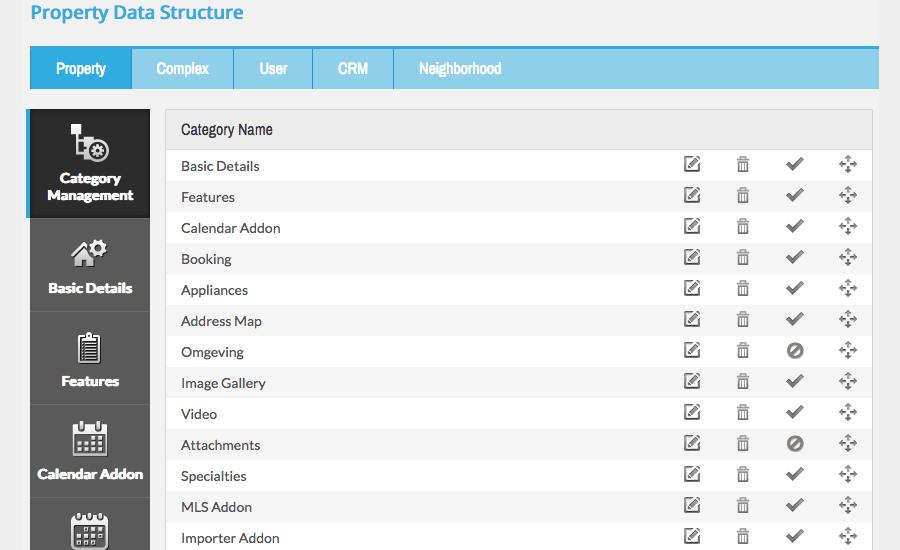
Customize the front-end property search and listing pages from the Widgets menu and WPL Flex.
 STEP 10
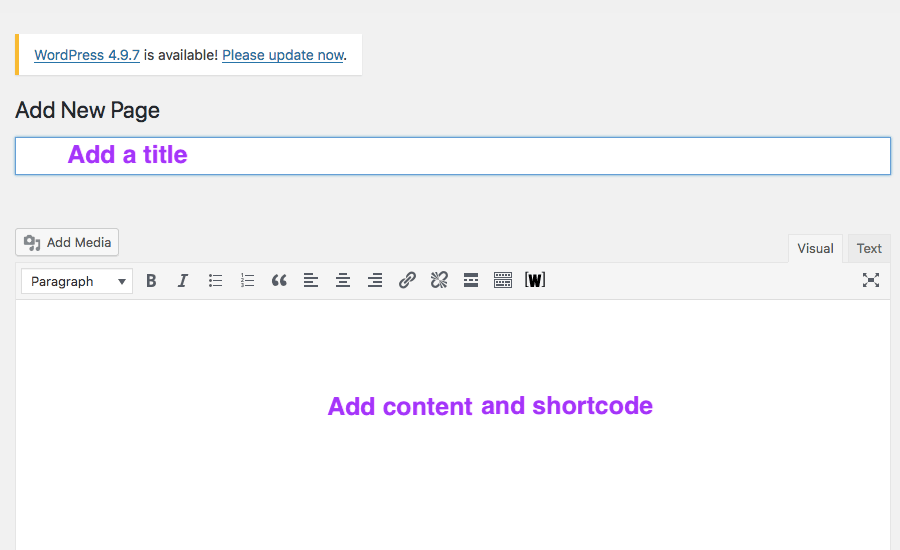
Add Pages
Add pages for your IDX display, agents, neighborhoods, blogs, etc. Then use WPL short code to add features to the appropriate page.
 STEP 11
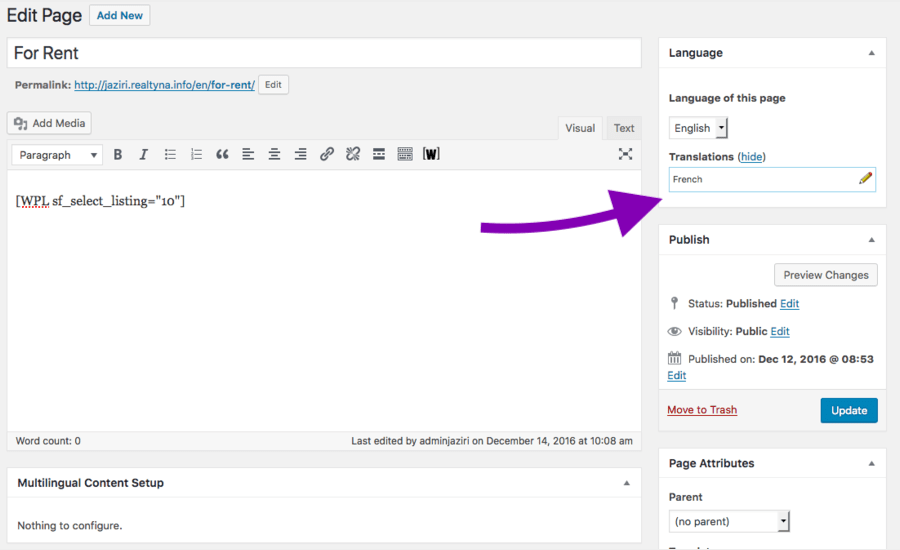
Translate Pages
Use WPML to create translations for each page.
 STEP 12
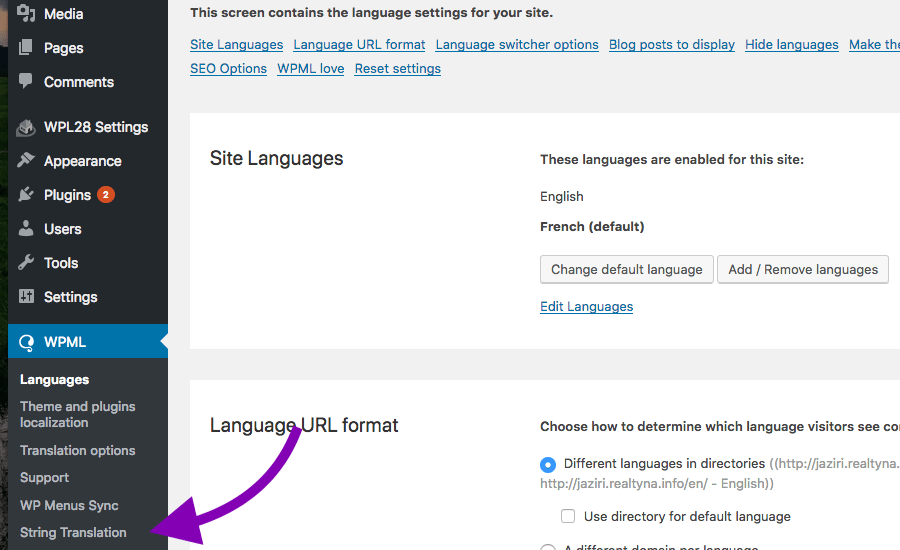
Translate Strings
Use WPML to translate text strings that are not related to pages or posts.
 For more tips for real estate agents, check out LoopNet/CoStar Alternatives: How to Build a Commercial Real Estate Site and Outrank the Portals and How to Activate Your YouTube Channel and Generate More Leads.


Sorry, the comment form is closed at this time.