How to Customize Your Dashboard and Save Time on Your WordPress IDX Website
Working with a real estate IDX website is a balancing act. On the one hand, you need options to create a powerful site that helps generate leads. On the other hand, you do not want to spend hours just to make a simple change.
Tricks and shortcuts are valuable because they allow you to get online, update your site, and get back to your leads and clients.
Thankfully, the WordPress platform allows you to customize your dashboard, so you can optimize your workflows. In this blog post, we will show you how to customize your dashboard and save time on your WordPress IDX website.
How to Customize Your WordPress IDX Dashboard
Step 1
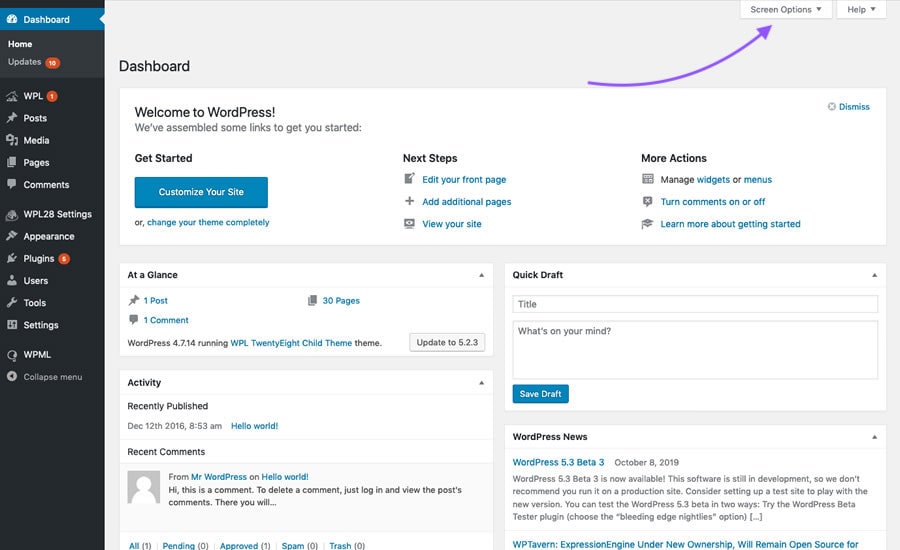
Select Screen Options
On most pages in the WordPress back-end there is a small Screen Options tab in the upper right corner. Select this to bring down the editing menu.
Step 2
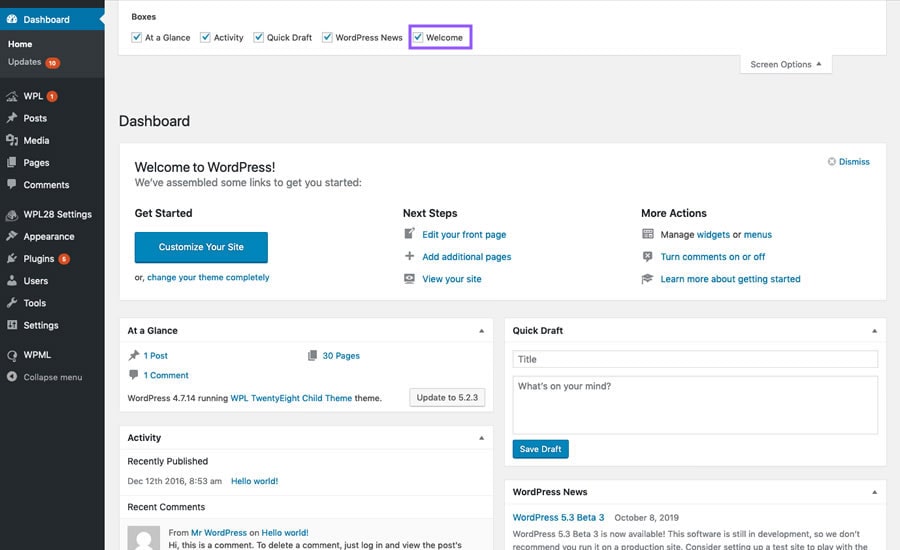
Select the Items You Want to Display
From this menu, you can choose what items and features to display habitually on the page. For example, if you never use the WordPress Welcome panel, you can deselect it here.
Step 3
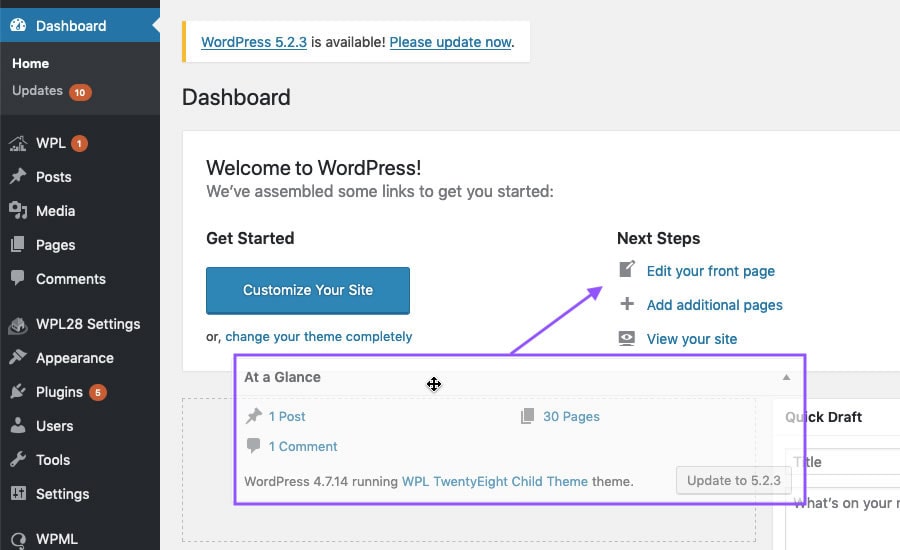
Drag Remaining Items
If you hover over one of the remaining features on your dashboard page, the cursor changes into arrows. You can use this to drag and arrange items in a way that works for you.
Now, you know how to customize your WordPress IDX dashboard. Let’s look at some easy changes you can make to save time.
3 Changes to Help you Save Time on Your WordPress IDX Website
Show More Comments
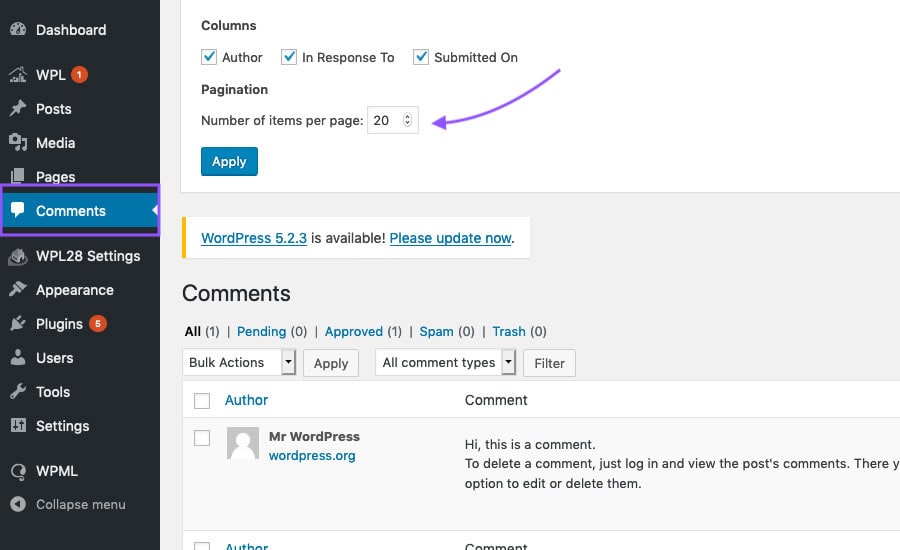
Many agents want to generate discussion on their site. But this can lead to a flood of comments to review. To make this task easier, you can increase the number of comments WordPress displays by default. This allows you to review them without having to click through a dozen pages or more.
Select Comments in your dashboard panel. Then, select Screen Options, and increase the number of items per page.
Show Blog Post Excerpt
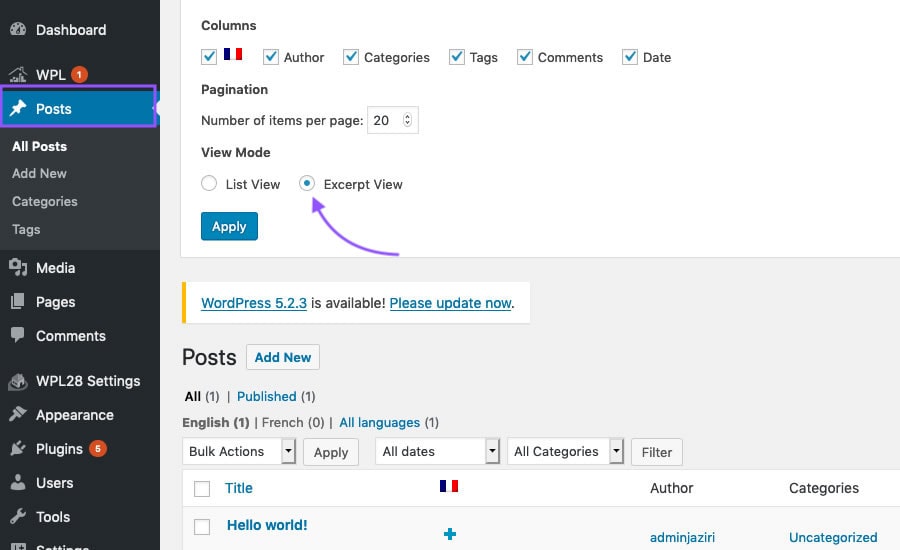
If you produce a lot of blog posts you may have a hard time going through them and finding the one you need. As a default, WordPress will show you the title and the author. But you can customize this to show an excerpt as well.
Select Posts in your dashboard panel. Then, select Screen Options, choose Excerpt View and click Apply.
Change the Page-Editing Layout
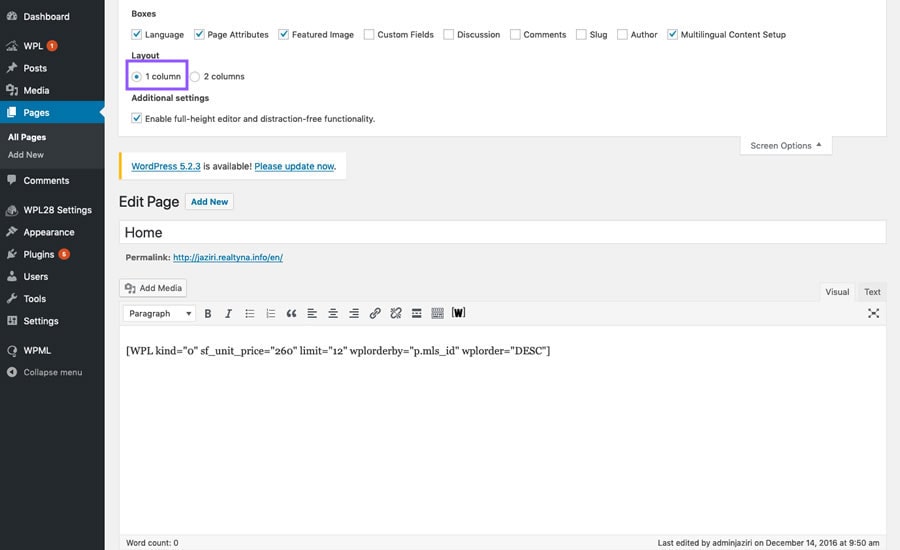
When editing a page, WordPress defaults to this old newspaper-style layout with multiple columns and a left-to-right workflow. But the modern Internet has reoriented itself top-to-bottom to facilitate scrolling and swiping down. If you are more familiar with the vertical orientation you can change it.
In any page-editing window, select Screen Options. Then choose 1 Column.
So there you go. This is how you customize your dashboard and save time on your WordPress IDX website. Do you have questions or feedback? Leave them in the comments. Did you like this article? For more WordPress IDX tips and tricks, see How to Backup Your WordPress IDX Website.
*Please note: Not all plugins are 100% compatible with other plugins, solutions or Realtyna products. Please confirm or test compatibility with your solutions before implementing. While we are happy to help you find a compatible solution, we do not endorse any 3rd party products. Suggestions are only made for reference or guide.


Sorry, the comment form is closed at this time.